
What Is the Right Renovation Order for a 1960s House?
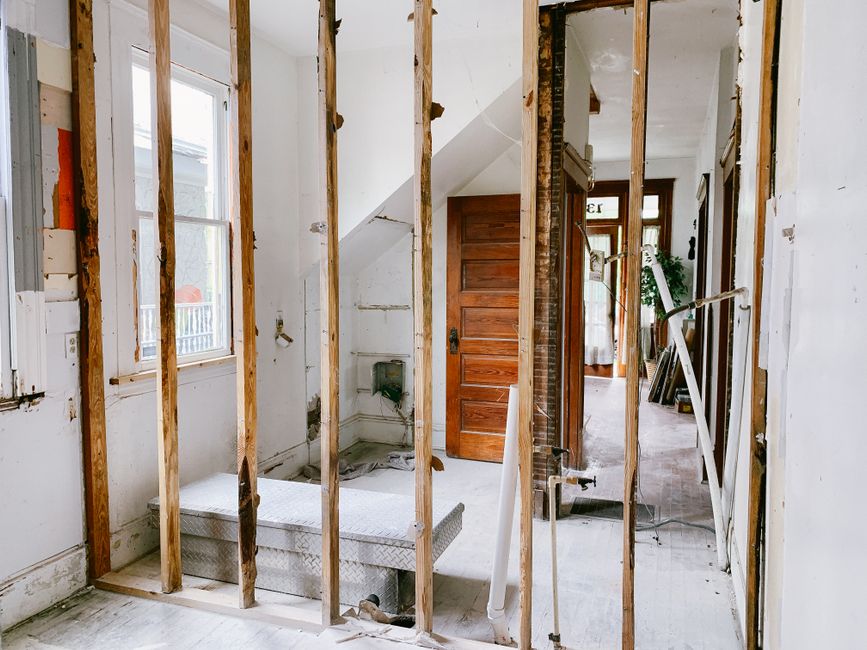
Renovate a 1960s house from hidden risks outward: inspect structure, roof, moisture, electrical conditions, ventilation, insulation, and hazardous materials before selecting finishes or changing the layout. Then repair defects, complete behind-the-wall work, improve the building envelope, and finally install surfaces and fixtures. This order protects original character while preventing finished rooms from being opened again.
The practical rule is simple: do not spend money making a room attractive until you know what is behind, above, and around it. A new kitchen cannot compensate for a leaking roof, and fresh paint does not solve trapped moisture. The U.S. Department of Energy puts it plainly: “Don’t just fix the visible symptoms.”
What should I renovate first in a 1960s house?
Start with a whole-house inspection and the work that protects health, safety, water management, and future access. Design choices come after that. This is the outside-in, rough-in-before-finish sequence: it prevents the expensive mistake of insulating, drywalling, or decorating before the conditions behind those finishes are understood.
| Stage | What to check or do | Why it comes now |
|---|---|---|
| 1. Before design | Inspect roof condition, visible moisture damage, windows, insulation, attic conditions, ventilation, electrical conditions, and materials likely to be disturbed. | It defines the real scope before layouts and finishes create commitments. |
| 2. Correct defects | Address active leaks, moisture sources, unsafe combustion conditions, improperly vented bathroom fans, and issues found during assessment. | Insulation and cosmetic repairs can conceal or worsen unresolved problems. |
| 3. Plan the envelope | Assess air leakage, insulation, ducts, wall conditions, and ventilation before closing cavities. | Energy work needs a complete view of moisture and combustion safety. |
| 4. Complete disruptive work | Finish planned work that requires opening walls, ceilings, attics, or floors. | Preserves access and avoids destroying new finishes later. |
| 5. Finish rooms | Install cabinetry, flooring, paint, fixtures, and retained character details. | These are the visible layers, so they belong last. |
Build the first inspection around a written checklist. For the roof and attic, look for signs of leaks, bathroom fans that terminate in the attic, combustion appliances, attic flooring that blocks access, active knob-and-tube wiring, and vermiculite insulation. The Department of Energy's attic air-sealing guidance says these conditions must be dealt with before the retrofit proceeds. That is not a finishing detail. It is the gate between planning and work.
For windows and walls, inspect every window for frame and pane type, moisture or rot at the sill and wall, caulking, weatherstripping, operation, orientation, and shading. Check insulation and obvious air-leak paths, but do not treat added insulation as an automatic win. The DOE advises identifying and repairing moisture problems before insulation work; trapped moisture followed by cosmetic repair is a repeat-work trap.
For systems, make the inspection specific enough to change the schedule. Record what is visible, what will be opened, and what needs qualified evaluation. A qualified residential energy professional can assess insulation and air leaks, and the Building America guidance lists blower-door testing, duct pressurization, infrared imaging, combustion testing, and carbon-monoxide sampling among possible assessment tools. The strong planning line is: “We will confirm the conditions before we price finishes.”
How can I modernize a 1960s home without removing all its character?
Modernize a 1960s home by retaining sound defining details and concentrating change on function: storage, lighting, room connections, ventilation, and comfort. The goal is not to freeze the house in time. The goal is to stop useful original features from being demolished simply because the renovation sequence started with a style board instead of a condition report.
Use a keep, adapt, replace pass before demolition. “Keep” means a feature is sound, usable, and worth protecting during adjacent work. “Adapt” means it stays but gains better lighting, storage, hardware, or room flow around it. “Replace” means it conflicts with a confirmed repair need or planned work. This gives the project team a shared decision rule instead of a vague instruction to “preserve character.”
- Weak brief: “Make it modern.”
- Stronger brief: “Retain sound original details, improve storage at the room edges, and complete all wall-opening work before final finishes.”
Light and flow often improve without a major structural change. Clear circulation routes, reduce visual obstacles, place storage where it does not interrupt movement, and use the renovation to make windows operate, seal, and shed water correctly. If exterior siding work is already planned, DOE guidance identifies an opportunity to inspect poorly insulated wall cavities and consider insulating sheathing while preserving drainage-plane and flashing details. That is a smart overlap: one disruption, several questions answered.
Do not air-seal in isolation. EPA's single-family renovation guidance warns that reducing air leakage should not happen without ensuring combustion-appliance venting and outdoor-air ventilation. The practical replacement for “make it tighter” is: “Improve the envelope after we have checked moisture, combustion venting, and ventilation.” It is a longer sentence. It can prevent a longer project.
Protecting character also means protecting the schedule. Photograph and label retained features before nearby work begins, define which surfaces must remain untouched, and keep finish selection behind the inspection decisions. You save cognitive load for everyone involved because the question is no longer “What should we redo?” It becomes “What can we safely finish now?”
Do houses built in the 1960s have lead paint or asbestos?
Houses built in the 1960s can contain lead-based paint and asbestos-containing materials, so testing and safe planning should happen before demolition or work that disturbs suspect surfaces. The federal government banned residential lead-based paint sales in 1978, placing a 1960s house in the period of potential use. EPA estimates that approximately three-quarters of U.S. homes built before 1978 still contain some lead-based paint.
Lead paint becomes a renovation issue when planned work disturbs painted surfaces and creates lead dust. For paid work in pre-1978 homes that disturbs painted surfaces, EPA's Renovation, Repair and Painting Rule requires certified firms and trained workers using lead-safe practices. EPA recommends hiring a lead-safe certified contractor when planning work in a pre-1978 home. Read the requirements directly through the EPA lead renovation program rather than treating age alone as a diagnosis.
Asbestos cannot be identified by appearance. EPA states that it is not possible to tell whether a material contains asbestos simply by looking at it. Potential locations relevant to older homes include floor tile, ceiling tile, old pipe wrap, attic and wall insulation, vinyl flooring and adhesives, ceiling textures, joint compounds, roofing, siding, and original plaster.
The decision rule is direct. If suspected material is undamaged and the project will not disturb it, EPA guidance says to leave it alone. If it is damaged or the work will disturb it, use a properly trained and accredited asbestos inspector and a qualified laboratory before disturbance. The EPA's homeowner asbestos guidance supports that sequence. In attics, DOE guidance adds a specific stop sign: vermiculite insulation may contain asbestos and must be tested before air sealing or insulation work proceeds.
Run this week's drill before approving any demolition: make a one-page “open first” list. Put every wall, ceiling, floor, attic, roof, or window area that the project will disturb on it. Next to each one, write the condition to inspect, whether suspect paint or material may be present, and what work must happen before the area is closed again. That page is more useful than another round of finish samples.
Frequently Asked Questions
Should I replace the electrical wiring before remodeling walls?
Assess electrical conditions before closing or refinishing walls, because later access can mean reopening completed work. The DOE attic guidance specifically says active knob-and-tube wiring must be addressed before attic air-sealing work proceeds; use the pre-design inspection to identify electrical conditions that affect the planned scope.
What makes a 1960s floor plan feel more open without removing a load-bearing wall?
Improve the route through the rooms before changing the structure: remove unnecessary visual clutter, plan storage at the edges, and use lighting and finishes to clarify zones. Keep the structural question separate from the design wish list, and involve a qualified professional before altering elements that may have a structural function.
Which original 1960s features are worth keeping?
Keep features that are sound, useful, and central to the home's visual identity, then build the renovation sequence around protecting them. Original details are not a reason to ignore moisture, ventilation, or hazardous-material concerns; test or assess first when planned work could disturb older materials.
Sources
- U.S. Environmental Protection Agency: Lead Renovation, Repair and Painting Program
- U.S. Environmental Protection Agency: Asbestos and Home Remodeling
- U.S. Environmental Protection Agency: Single-Family Renovation Protocols
- U.S. Department of Energy Building America: Wall Air Sealing Guide
- U.S. Department of Energy Building America: Attic Air Sealing Guide
- U.S. Department of Energy: Homeowner Guide